Water Heater Pilot Light Won't Stay Lit: Troubleshooting and Fix Guide
Pilot light keeps going out? Walk through the 6 most common causes and learn which fixes you can handle yourself.

May 26, 2026
Safety Disclaimer
Water heater maintenance involves working with pressurized systems, scalding hot water, and potentially hazardous electrical or gas connections. Always shut off power (electric heaters) or gas supply (gas heaters) and allow water to cool to a safe temperature before beginning any maintenance. Wear appropriate safety equipment including gloves and eye protection. If you're uncomfortable with any step, contact a licensed plumber.
A gas water heater pilot that lights, then dies when you release the knob, is usually a thermocouple, a dirty pilot orifice, or a draft — not a failed tank. Manufacturer lighting labels and gas-valve service notes put those three first. This page is the overnight-dropout and thermocouple-first list: what to clean, what to replace, and when the gas valve is a plumber job.
It is written from those manuals plus homeowner and plumber reports. It is not a first-person shop diary. Unique angle here: overnight dropout and the six-cause cost list. The longer assembly walkthrough is the pilot-light diagnosis guide. The compact cause-and-cost twin is the pilot-light cause list.
Most of these fixes cost $10 to $25 in parts and under 30 minutes. A failed gas valve does not.
How the Pilot Light System Works
Before troubleshooting, it helps to understand what you are working with.
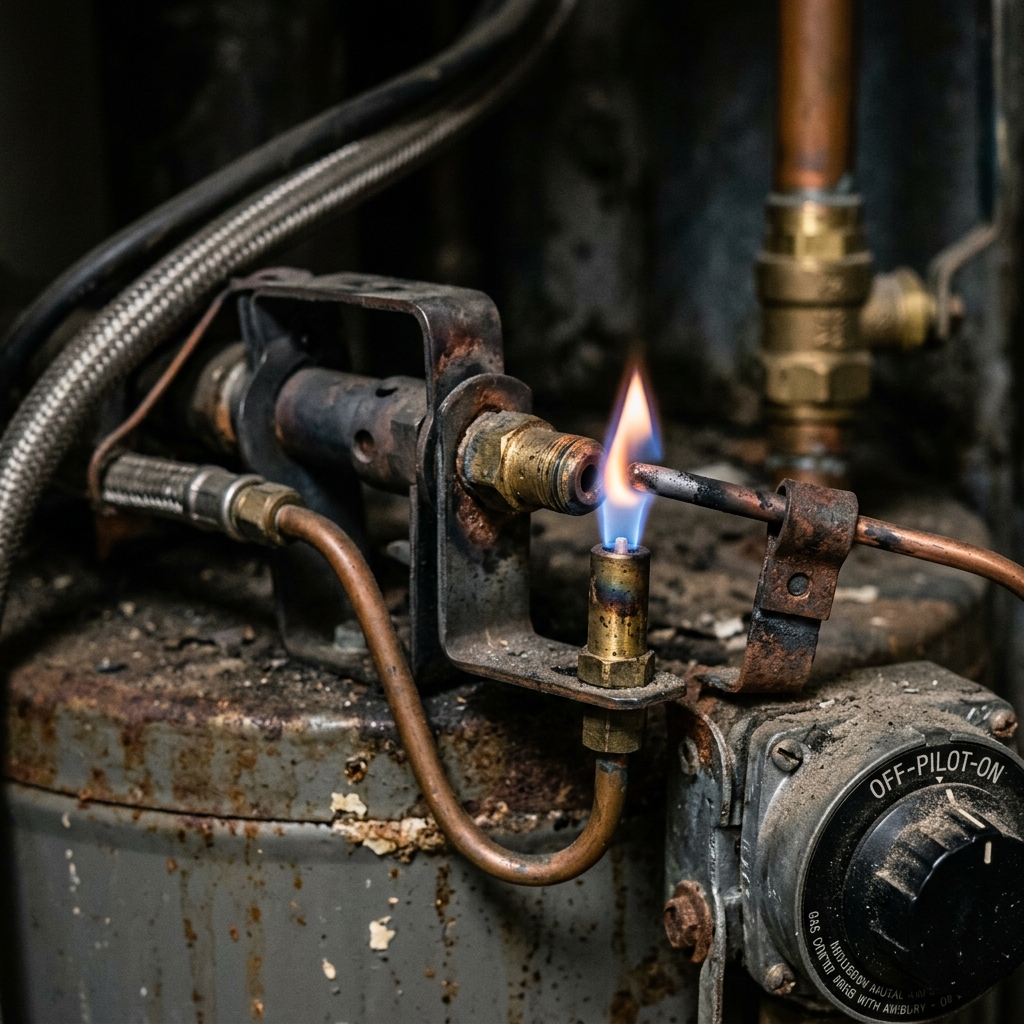
The pilot light is a small flame that burns continuously at the base of your gas water heater. Its job is to ignite the main burner when the thermostat calls for heat. A safety device called a thermocouple sits with its tip in the pilot flame. As long as the thermocouple senses heat, it sends a small electrical signal (measured in millivolts) to the gas control valve, telling it to keep the gas supply open.
When the pilot goes out, the thermocouple cools down within about 20 seconds and the electrical signal drops. The gas valve closes automatically, cutting off all gas flow. This is a critical safety feature that prevents raw gas from accumulating in your home.
So when your pilot won’t stay lit, something in this chain is failing: the flame itself, the thermocouple, the gas supply, or the gas valve.
Before You Start: Safety Rules
Gas work demands respect. Follow these rules:
- If you smell gas strongly, do not attempt any repairs. Leave the house immediately and call your gas utility from outside. Do not flip any switches or use your phone inside the house.
- Work in a well-ventilated area. Open a window or door to the room if possible.
- Keep a fire extinguisher accessible.
- Never use an open flame to check for gas leaks. Use soapy water on connections instead.
For a full overview, check our water heater safety guide.
Cause 1: Dirty or Misaligned Thermocouple
This is the most common cause of a pilot light that won’t stay lit. If the thermocouple tip is coated with soot, carbon, or corrosion, it cannot generate enough voltage to keep the gas valve open. If it has been bumped or bent away from the pilot flame, it does not get hot enough to produce a signal.
How to Fix It
- Turn the gas control to “Off” and let everything cool for 10 minutes.
- Locate the thermocouple. It is a thin copper tube that runs from near the pilot flame to the gas control valve.
- Follow it to the tip, which sits in or near the pilot flame.
- Clean the tip with fine-grit sandpaper (220 grit works well) or steel wool. Remove any soot, carbon, or white oxidation.
- Check the position. The tip should be directly in the pilot flame, fully engulfed. If it is sitting beside the flame or below it, gently bend the thermocouple bracket so the tip sits in the top third of the flame.
- Relight the pilot and hold the button for a full 60 seconds before releasing.
Cost: Free. Time: 15 minutes.
Cause 2: Failed Thermocouple
Thermocouples are wear items. They last 5 to 10 years on average and then stop generating enough millivolts to keep the gas valve open. If cleaning and repositioning did not fix the problem, the thermocouple has worn out.
How to Fix It
- Turn the gas control to “Off.”
- Disconnect the thermocouple from the gas control valve. It threads into a brass fitting on the bottom of the valve. Use a small wrench (usually 7/16 inch) to unscrew it.
- Remove the thermocouple from its bracket at the burner assembly.
- Take the old thermocouple to a hardware store for a length match, or buy a universal 24- to 36-inch thermocouple. Residential water-heater leads are usually 18 to 36 inches with an 11/32 or 7/16 inch nut at the gas valve. A 48-inch furnace lead will fit the thread and still leave a coil of extra tubing next to the burner.
- Install the new thermocouple in reverse order. Thread it finger-tight into the gas valve, then snug with a wrench. Do not overtighten. The brass fitting strips easily.
- Position the tip in the top third of the pilot flame and relight.
Listing check (thermocouple): confirm the lead length reaches from the pilot bracket to the gas valve (typically 18–36 inches) and the nut is 11/32 or 7/16. Furnace-only 48-inch leads and millivolt generators share the same browse page.
Cost: $12 to $20 for the part. Time: 20 to 30 minutes.
After replacing the thermocouple, this is a good time to also check whether your anode rod needs attention since you are already working on the heater.
Cause 3: Clogged Pilot Tube
The pilot tube is the small gas line that feeds the pilot flame. It can clog with dust, lint, spider webs, or debris, especially in garages, basements, or workshops. A partially clogged pilot tube produces a weak, small flame that cannot heat the thermocouple adequately.
How to Identify It
- The pilot flame is small, yellow, or wavering instead of a steady, sharp blue cone
- The pilot lights but produces a flame less than half an inch tall
- The pilot goes out within 30 seconds of releasing the control button
How to Fix It
- Turn gas to “Off” and wait 10 minutes.
- Locate the pilot tube. It is a thin aluminum or copper tube that runs from the gas valve to the burner assembly.
- Find the pilot orifice (the tiny opening where gas exits to create the pilot flame).
- Use a sewing needle or thin wire to carefully clear the orifice. Do not ream it wider.
- Blow compressed air through the tube to clear any debris further back.
- Reassemble and relight.
Cost: Free. Time: 15 to 20 minutes.
Cause 4: Drafts and Air Currents
Strong drafts can blow out the pilot light, especially in garages, open basements, or rooms near HVAC return vents. The draft hood on top of the water heater is designed to prevent downdrafts through the flue from reaching the pilot, but it cannot handle cross-drafts or strong competing airflows.
How to Identify It
- The pilot goes out at random intervals, not immediately after lighting
- It happens more often when doors or windows are open, or when exhaust fans (kitchen, bathroom, dryer) are running
- The flame visibly flickers or leans to one side
How to Fix It
- Identify the draft source. Stand near the water heater and hold a lit match. Watch which direction the flame leans.
- Seal gaps, close windows, or redirect the airflow away from the heater.
- Make sure the draft hood on top of the heater is properly seated and not damaged.
- Verify that your home has adequate combustion air. Gas water heaters in enclosed rooms need fresh air vents to the outside, typically two louvers in the door or wall.
If competing exhaust appliances are the issue (a powerful range hood pulling air down the water heater flue), the solution may require a professional to install a power vent or reroute the flue.
Cause 5: Faulty Gas Control Valve
If you have ruled out the thermocouple, pilot tube, and drafts, the gas control valve itself may be defective. The valve contains an electromagnet that the thermocouple energizes. If the electromagnet fails, it cannot hold the valve open regardless of the thermocouple signal.
How to Identify It
- A brand new thermocouple does not fix the problem
- The pilot tube is clear and the flame is strong
- No drafts are present
- You can hear a clicking sound when the valve releases immediately after you let go of the pilot button
How to Fix It
Gas valve replacement is a job for a licensed technician. The valve is an integral part of the gas system, and improper installation creates a serious leak hazard.
A gas valve typically costs $150 to $250 for the part, plus $100 to $200 in labor. On a water heater older than 8 years, this repair often does not make financial sense compared to full replacement. Read our DIY vs. plumber decision guide for help with that call.
Cost: $200 to $400 installed.
Cause 6: Insufficient Gas Pressure
Low gas pressure from the supply line can produce a weak pilot flame that cannot sustain the thermocouple signal. This is less common but happens in homes where multiple gas appliances run simultaneously (furnace, stove, fireplace, dryer) and the gas meter or supply line is undersized.
How to Identify It
- The pilot goes out when other gas appliances kick on
- The pilot flame is consistently weak regardless of thermocouple or orifice condition
- Other gas appliances also seem to underperform (low burner flames on the stove, slow furnace heat-up)
How to Fix It
Gas pressure testing requires a manometer and should be done by a licensed technician or your gas utility. The incoming pressure should be 7 inches of water column (WC) for natural gas. If it is low, the gas company may need to adjust the regulator at the meter, or the supply line may need upsizing.
Draft or Thermocouple? Read the Dropout Pattern Before Buying
Drafts and a worn thermocouple account for most repeat pilot outages, and they are constantly mistaken for each other — one is a ventilation and sheet-metal problem, the other is a twelve-dollar part. The outage pattern tells you which one you have before you spend anything:
| What you observe | Points to a draft | Points to the thermocouple |
|---|---|---|
| Flame goes out the moment you release the knob | — | Yes |
| Flame runs for hours, then dies overnight | Possible (night HVAC cycling) | Yes |
| Flame visibly leans, flutters, or gutters | Yes | — |
| Steady blue flame that still drops out | — | Yes |
| Outages track wind, open windows, dryer or kitchen exhaust | Yes | — |
| Outages have no trigger and get more frequent over weeks | — | Yes |
| Heater sits in a garage or open basement with cross-airflow | Yes | Possible |
| Cleaning the tip improved things for a while | — | Yes |
The overnight case deserves its own note, because it is the search that brings most people here. A thermocouple’s output falls as the sensing junction ages, and it falls further when the room around the heater is cold. A marginal tip can hold the gas valve open at two in the afternoon and release it at four in the morning, which looks random and is not. Night is also when furnace fans and exhaust appliances cycle and change the pressure in the house, so a genuine draft can produce the same pattern. Split them with the match test from Cause 4: on a cold evening, hold a lit match beside the draft hood with the house closed up, then again with the furnace running. Still air plus overnight dropouts points at the thermocouple.
How to Relight the Pilot Light
Once you have addressed the root cause, here is the standard relighting procedure:
- Turn the gas control knob to “Off.” Wait 5 minutes for any residual gas to dissipate.
- Turn the knob to “Pilot.”
- Press and hold the pilot button — on combination controls you press the knob itself — and keep it down while you click the piezo igniter, or bring a long match or lighter to the pilot opening.
- When the flame appears, keep holding for a full 60 seconds. That is how long the thermocouple needs to come up to temperature and hold the valve open.
- Release the button slowly. If the flame holds, turn the knob to “On”; the main burner should light within a few seconds.
- If the pilot dies the instant you release, stop relighting and work back through Causes 1 and 2 — the flame is not the problem, the safety chain is.
The label on the front of your heater overrides this list wherever the two differ. Manufacturers print the exact sequence for your control, and some combination valves specify a slightly different hold time.
Water Heater Thermocouple vs. Universal Furnace Kit
When you go to buy the replacement, you will notice the parts listings are dominated by “universal” thermocouple kits aimed at furnaces. Here is what differs between that world and yours, and what does not:
- The standard is shared. Standing-pilot furnaces, boilers, and water heaters all use the same class of 30-millivolt thermocouple with the same small threaded connection at the gas valve. That shared standard is why a furnace thermocouple fits a water heater at all, and why the browse pages mix the two together.
- Length is the real difference. Water heater runs from the pilot bracket to the valve are usually 18 to 36 inches. Universal furnace leads come longer, commonly 24 to 48 inches, and a 48-inch furnace lead will thread into your valve and leave a coil of extra tubing next to the burner. It works, but route the coil clear of the burner head so it cannot rest against hot metal, and confirm the burner access door still seats flat on its gasket — a door that no longer seals creates the exact draft problem you were trying to eliminate.
- Kits add hardware, not capability. A universal kit typically ships with spare mounting clips and adapter fittings to cover the two common nut sizes (11/32 and 7/16 inch). None of it is water-heater-specific. You are buying the standard wear part plus a bag of hardware you may never use.
- Do not buy a thermopile by accident. Newer heaters with push-button or electronic ignition use a thermopile, sometimes called a pilot generator: a thicker probe that produces hundreds of millivolts instead of roughly thirty, and connects with two wire terminals rather than a copper tube threading into the valve. Nothing in a thermocouple kit will stand in for it. If your gas valve has terminal screws and no thermocouple port, you need the thermopile — the same trap flagged in the listing check under Cause 2, because millivolt generators share the same browse page as thermocouples.
Disclosure: outbound product links on this page, including the Amazon thermocouple link above, are affiliate links. If you buy through one, this site earns a small commission at no additional cost to you.
Keeping the Pilot Lit: Prevention
Pilot problems are mostly housekeeping failures that take a season to develop:
- Once a year, shut the gas control off and vacuum lint and dust out of the burner compartment. Lint drifting onto the pilot orifice is what turns a sharp blue cone into a wavering yellow flame that cannot heat the thermocouple.
- Look at the pilot flame with the room closed and again with the door open, so you know what normal looks like before something drifts.
- Confirm the draft hood is seated and level, and that combustion-air louvers in the door or wall are not blocked by storage, insulation, or snow.
- If the heater lives in a cabin or unheated space, cold-season shutdown has its own procedure; the winterize and freeze guide covers it.
The Department of Energy’s Energy Saver water heating guide folds routine upkeep, including draining sediment, into its guidance on keeping a heater efficient. For scheduling, use the seasonal maintenance checklist or the printable annual checklist; gas-specific chores are itemized in the gas vs. electric maintenance comparison.
When a Pilot Problem Is Really a Replacement Question
A pilot that will not stay lit is almost never fatal by itself. It becomes one in three cases:
- The diagnosis lands on the gas control valve on a heater past the 8-to-10-year mark. A $200 to $400 valve job on a tank with limited life left is usually money against a replacement — see how long water heaters last.
- Thermocouples keep failing every few months on the same aging tank, which usually means the burner environment — heat, spillage, corrosion — is eating them. That pattern is one of the signs a water heater is failing.
- The repair estimate pushes you into shopping. Start with the best water heater brands comparison and check certified models against the ENERGY STAR water heater listings.
Frequently Asked Questions
How much does it cost to fix a pilot light on a water heater?
Most pilot light issues cost $10 to $25 to fix yourself. A thermocouple replacement is the most common repair and runs about $12 to $20 for a universal part. If the gas valve needs replacement, expect $200 to $400 including professional labor.
Is it dangerous if the pilot light goes out on a water heater?
Modern gas water heaters have a thermocouple safety system that shuts off gas flow when the pilot goes out. This prevents gas from accumulating. However, if you smell gas near the water heater at any time, leave the house immediately and call your gas company from outside.
Why does my pilot light go out overnight?
A pilot light that goes out overnight is usually caused by a failing thermocouple that can barely maintain the signal when the ambient temperature drops. Drafts that increase at night when HVAC systems cycle can also blow out a marginal pilot flame. Replace the thermocouple as a first step.
How long should a water heater thermocouple last?
A thermocouple typically lasts 5 to 10 years under normal conditions. Water heaters in dusty environments, garages, or workshops tend to wear thermocouples faster because debris accumulates on the tip and degrades the heat-sensing junction.
Can I relight the pilot light myself?
Yes. The relighting procedure is printed on a label on most water heaters. Turn the gas control to Pilot, press and hold the pilot button, use the igniter or a long match to light the pilot, and hold the button for 30 to 60 seconds before releasing. If it goes out immediately, the thermocouple likely needs attention.
If the pilot is lit and steady but the water is still cold, the fault has moved upstream of the burner — the full troubleshooting checklist picks it up from there.
Editorial Team
Nobody should pay a plumber $300 to turn a drain valve. Our guides are built from manufacturer documentation, plumbing code references, and the documented experience of homeowners and plumbers.