Water Heater Drain Valve Leaking: Causes and Fixes
Fix a leaking water heater drain valve with this DIY guide. Covers tightening, replacing, and upgrading valves to stop drips permanently.
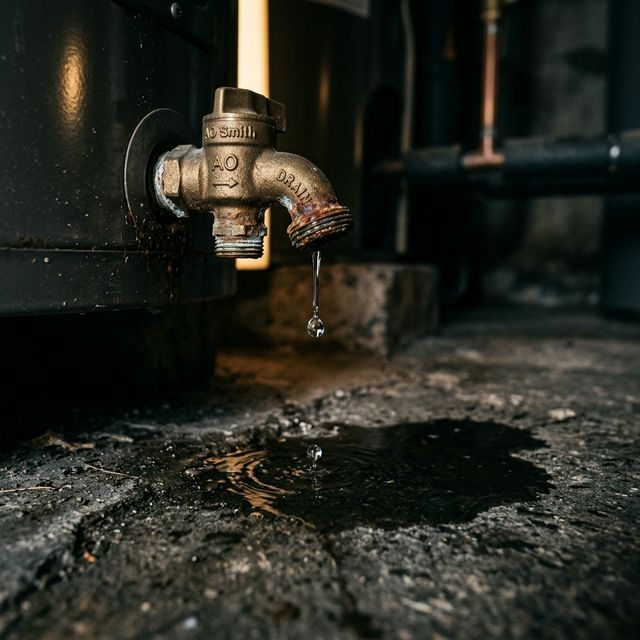
A small puddle under your water heater is easy to dismiss. A few drops here and there, maybe a damp spot on the floor. But water and time are a destructive combination. Even a slow drip from a drain valve can warp flooring, encourage mold growth, and cause hundreds of dollars in damage if left unchecked.
The fix is usually simple. In most cases you can stop the leak in under an hour with basic tools and a trip to the hardware store. This guide walks through every cause and the corresponding repair.
Identifying the Leak Source
Before you assume the drain valve is the problem, make sure the water is actually coming from the valve and not somewhere else. Water runs downhill and follows surfaces, so a leak higher on the tank can drip down and pool near the drain valve.
How to Confirm It Is the Drain Valve
- Dry the area completely. Wipe down the entire bottom half of the water heater and the floor beneath it with a dry towel.
- Lay paper towels or newspaper around the drain valve. This makes fresh drips easy to spot.
- Wait 30 minutes to an hour. Check where the new moisture appears.
- Look directly at the valve. A leaking drain valve drips from the valve outlet (the hose connection point) or from the joint where the valve threads into the tank.
Other Common Leak Sources
If the water is not coming from the drain valve:
- Temperature and pressure (T&P) relief valve. This valve is on the side or top of the tank, with a discharge pipe running down. If it is dripping, the tank pressure may be too high. See our safety guide for T&P valve troubleshooting.
- Cold water inlet or hot water outlet connections. Check the fittings at the top of the tank for moisture.
- Tank body. Water seeping from the tank itself (not a valve or fitting) usually means internal corrosion and tank failure. This is not repairable and means it is time for a new water heater.
Common Causes and Fixes
Cause 1: The Valve Is Not Fully Closed
This is the most common cause, and the easiest fix. If you or a plumber recently drained the water heater, the valve may not have been turned all the way back.
Fix: Turn the valve handle clockwise until it stops. On a gate-style valve (the standard type on most water heaters), this may require several full turns. Tighten firmly but do not force it, as plastic valves can crack under excessive torque.
Cause 2: Sediment Is Preventing a Seal
Sediment particles can lodge in the valve seat, preventing the gate or washer from closing completely. You can often hear a slight hissing or see gritty residue around the valve opening.
Fix:
- Attach a short garden hose to the valve.
- Open the valve fully to flush water and sediment through it.
- Close the valve sharply several times in succession to dislodge particles from the seat.
- If the leak stops, do a full flush to remove the rest of the sediment from the tank.
Cause 3: Worn Internal Washer
Gate-style drain valves use a rubber washer that degrades over time from heat exposure and mineral contact. Once the washer deteriorates, the valve cannot seal even when fully closed.
Fix: Replace the valve. Attempting to replace just the washer inside a water heater drain valve is impractical for most homeowners. A new valve costs under $15, and the entire replacement takes about 30 minutes. See our valve replacement guide for instructions.
Cause 4: Cracked Valve Body
Plastic drain valves (white or gray, standard on many water heaters) are prone to cracking. Heat cycles, UV exposure in some installations, and physical stress from hose connections weaken the plastic over time. A cracked valve body will leak regardless of whether the internal seal is good.
Fix: Replace the valve. This is actually an opportunity to upgrade from a plastic valve to a brass ball valve, which is more durable and far less likely to develop this problem again.
Cause 5: Loose or Corroded Threads
The drain valve threads into the tank with pipe threads. Over time, the thread sealant (Teflon tape or pipe dope) can degrade, or corrosion can create gaps in the threaded connection. This causes a leak at the base of the valve where it meets the tank, not from the valve outlet.
Fix:
- Drain the tank. You need the water level below the valve.
- Unscrew the old valve.
- Clean the tank threads with a wire brush.
- Wrap the new valve threads with four to six wraps of Teflon tape (clockwise as you look at the thread end).
- Thread the new valve in by hand, then tighten with a wrench. One to one-and-a-half turns past hand-tight is usually sufficient.
The Temporary Fix: Capping the Valve
If you cannot replace the valve immediately, a brass hose cap provides a reliable temporary seal.
- Buy a brass garden hose cap with a rubber washer from any hardware store. They cost about $3.
- Thread it onto the drain valve outlet and tighten by hand, plus a quarter turn with pliers.
- Check for drips. The rubber washer should create a tight seal against the valve face.
This buys you time, but plan to replace the valve within a few weeks. A cap does not fix the underlying problem, and it adds another potential failure point.
Choosing a Replacement Valve
You have two main options:
Standard Gate Valve
These are the same type that came with the heater. They have a round handle that turns several times to open or close. They work fine and cost $8 to $12 for a brass version.
Pros: Familiar, inexpensive, widely available. Cons: Narrow bore that clogs more easily. Multiple turns to open and close. The gate mechanism wears over time.
Full-Port Brass Ball Valve
A ball valve uses a quarter-turn lever to open a full-diameter passage. These cost $15 to $25 and are a significant upgrade.
Pros: Quarter-turn operation. Full port means sediment passes through more easily. More durable mechanism. Less likely to leak over time. Cons: The lever sticks out further, which matters in tight installations.
If you are already replacing the valve, spend the extra $10 for a ball valve. You will thank yourself the next time you flush the tank.
When to Call a Plumber
Most drain valve leaks are straightforward DIY repairs. Call a professional if:
- The leak is coming from the tank body rather than any valve or fitting. This means the tank itself has corroded through.
- You cannot stop the flow when attempting to remove the old valve. If the valve threads are corroded to the point where removal damages the tank fitting, a plumber has tools and techniques to salvage the connection.
- The water heater is in a location where a leak during repair could cause significant damage (finished basement, upstairs closet) and you are not confident in managing the water.
For more guidance on DIY versus professional decisions, see our repair guide.
Preventing Future Leaks
Operate the valve annually. Even if you do not do a full flush, open and close the drain valve once a year to prevent it from seizing. Valves that sit untouched for years are far more likely to leak or stick.
Flush regularly. Sediment is the root cause of most valve problems. Keeping the tank clean keeps the valve clean. Aim for annual flushing at minimum.
Use Teflon tape correctly. When installing any valve, wrap the threads with four to six layers of Teflon tape, applied clockwise. Do not use too much, as excess tape can shred and clog the valve.
Install a drain pan. Every tank water heater should sit in a drain pan with a line running to a floor drain or outside. If the valve (or anything else) leaks, the pan catches the water before it reaches your floor.
Related Guides
- How to Replace a Water Heater Drain Valve, Full replacement walkthrough
- How to Drain a Hot Water Heater, Proper draining procedure
- Water Heater Safety Guide, Leak response and safety
- Best Water Leak Detectors, Early warning systems
Sources
- International Association of Certified Home Inspectors, Drain valve inspection standards
- Family Handyman, Fix a Leaking Water Heater, Valve repair techniques