How to Remove Sediment From a Water Heater (Complete Guide)
Remove sediment from your water heater using flushing, back-flushing, vinegar dissolution, and manual cleaning. Covers light to severe buildup.
Safety Disclaimer
Water heater maintenance involves working with pressurized systems, scalding hot water, and potentially hazardous electrical or gas connections. Always shut off power (electric heaters) or gas supply (gas heaters) and allow water to cool to a safe temperature before beginning any maintenance. Wear appropriate safety equipment including gloves and eye protection. If you're uncomfortable with any step, contact a licensed plumber.
Every water heater accumulates sediment. It is not a question of if, but how much and how fast. The minerals dissolved in your water supply, primarily calcium and magnesium, precipitate out every time the water is heated. Those particles sink to the bottom of the tank and build up over time.
A thin layer of sediment is not an emergency. A thick layer is. It reduces heating efficiency, drives up energy costs, causes noise, and eventually corrodes the tank from the inside out. Removing it restores your heater’s performance and can add years to its life.
This guide covers every method for removing sediment, from a basic flush for light buildup to chemical dissolution for the worst cases.
Understanding What Is in Your Tank
Water heater sediment is not a single substance. It is a mix of:
- Calcium carbonate, The primary component, especially in hard water areas. This is the same mineral that forms limescale on faucets and showerheads.
- Magnesium hydroxide, Another hard water mineral that precipitates at higher temperatures.
- Iron oxide (rust), From corroded steel inside the tank, especially when the anode rod is depleted.
- Sand and silt, In homes with well water, fine particulates from the aquifer accumulate in the tank.
- Aluminum hydroxide, If the water heater has an aluminum anode rod, corrosion products from the rod itself add to the mix.
Fresh sediment is loose and grainy. It flushes out easily with water flow. Old sediment that has been repeatedly heated compacts and calcifies into a hard layer that resists water flow. The removal method you need depends on which stage your sediment is at.
Method 1: Standard Flush (Light Buildup)
If you flush your water heater at least once a year, or if the sediment layer is less than six months old, a standard flush is sufficient.
When to Use This Method
- Annual or semi-annual maintenance
- Water coming from the drain valve is slightly cloudy or gritty but flows freely
- No popping noises or only mild, occasional pops
Steps
- Turn off the power. Gas: set the control to “Off” or “Pilot.” Electric: flip the breaker.
- Connect a garden hose to the drain valve. Route it to a drain, outside, or a bucket.
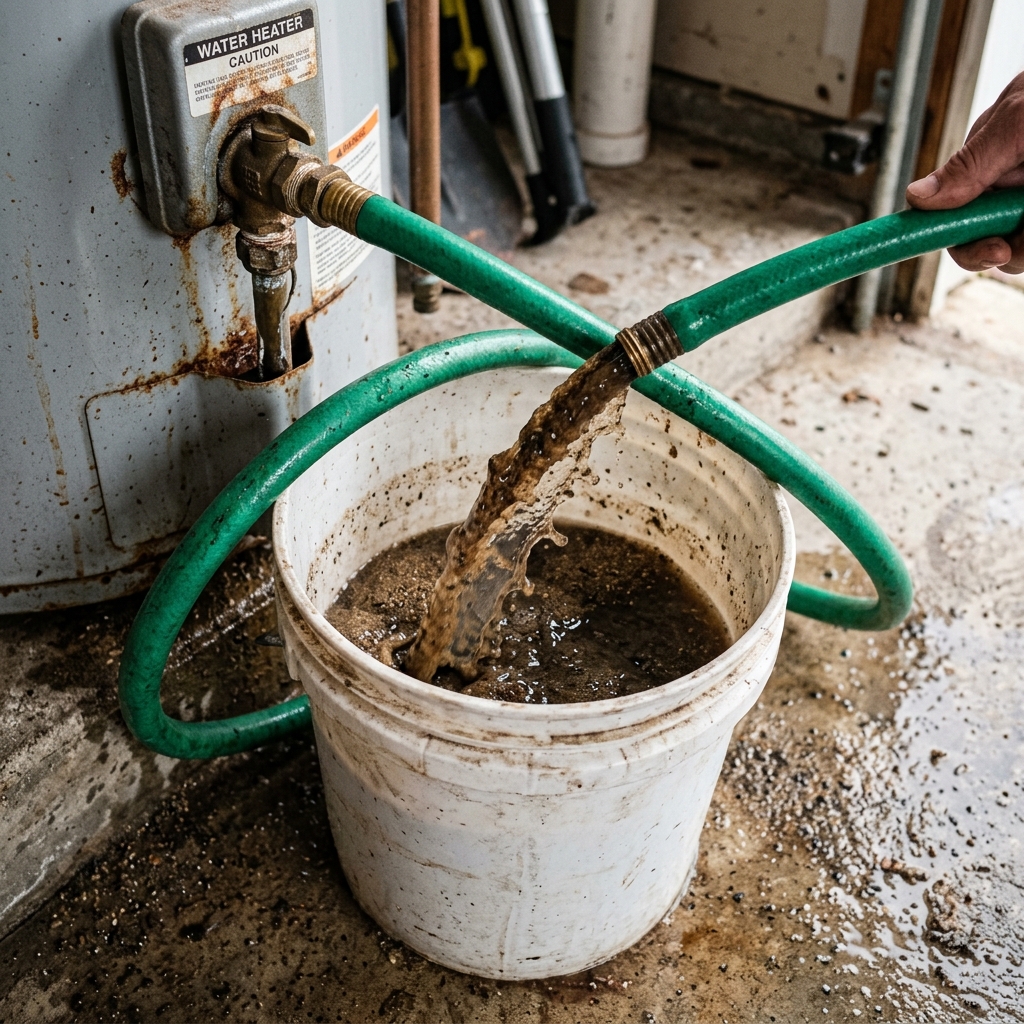
- Open the drain valve and let water flow for five to ten minutes. You do not need to shut off the cold water supply for this method. Leaving it on creates a flow that stirs up sediment as it exits.
- Watch the drain water. It will start cloudy or discolored and gradually clear. When it runs clear, you are done.
- Close the drain valve and disconnect the hose.
- Restore power.
Our full flushing guide has additional details and safety precautions.
Time Required
15 to 20 minutes.
Method 2: Full Drain and Multi-Cycle Flush (Moderate Buildup)
For tanks that have not been flushed in one to three years, or where the standard flush did not clear the sediment completely.
When to Use This Method
- Drain water is heavily discolored or contains visible chunks
- Popping noises are frequent
- Hot water volume has decreased noticeably
Steps
- Shut off the power and the cold water supply.
- Let the water cool for two to three hours. See our draining guide for full safety precautions.
- Connect a garden hose to the drain valve.
- Open the drain valve fully and open a hot water faucet upstairs to allow air in.
- Drain the tank completely. This takes 20 to 40 minutes for a 50-gallon tank.
- First flush cycle: Once the tank is empty, briefly open the cold water inlet valve. The incoming water stirs up sediment on the tank bottom. Let it run for two to three minutes, then close the inlet and let the stirred-up sediment drain out.
- Repeat the flush cycle three to four times, or until the water runs clear.
- Close the drain valve, open the cold water inlet fully, and refill the tank.
- Verify the tank is full by running a hot faucet until water flows steadily with no air.
- Restore power.
Time Required
45 to 75 minutes.
Method 3: Back-Flush (Heavy or Compacted Buildup)
When sediment has compacted enough to resist standard flushing, or when the drain valve keeps clogging during the flush, back-flushing reverses the water direction to break up the deposits.
When to Use This Method
- The drain valve clogs during flushing
- Drain water stops flowing before the tank is empty
- Standard flushing did not resolve popping noises
- The tank has not been flushed in three or more years
Steps (Summary)
- Connect a garden hose from a pressurized water source (outdoor faucet) to the drain valve.
- Force water backward through the valve for 60 to 90 seconds.
- Disconnect the supply hose and attach a drain hose.
- Forward flush to remove the loosened sediment.
- Repeat as needed.
For the complete step-by-step procedure, see our dedicated back-flush guide.
Time Required
30 to 60 minutes, depending on how many cycles are needed.
Method 4: Vinegar Soak (Hardened or Calcified Deposits)
When sediment has turned into a rock-hard calcium crust, mechanical and hydraulic methods may not be enough. Chemical dissolution with vinegar breaks down calcium carbonate at the molecular level.
When to Use This Method
- The tank has never been flushed and is five or more years old
- Back-flushing did not significantly improve drainage
- You can see or feel hard, concrete-like deposits at the drain opening
- A plumber has recommended descaling
Steps
- Drain the tank as completely as possible. Use a combination of gravity draining, back-flushing, and bucket removal to get the water level as low as you can.
- Remove the drain valve to create a larger opening (or use the anode rod port at the top of the tank).
- Pour 3 to 5 gallons of white distilled vinegar into the tank. Use a funnel and hose to direct the vinegar through the drain opening or anode port.
- Close the opening (reinstall the valve or use a temporary plug).
- Let the vinegar sit for 12 to 24 hours. The acetic acid reacts with calcium carbonate, producing carbon dioxide bubbles and a calcium acetate solution that washes away easily. You may hear fizzing inside the tank, which is normal.
- Open the drain valve and flush with fresh water. The dissolved deposits come out as a cloudy, slightly foamy liquid.
- Repeat if necessary. Very heavy deposits may require two or three cycles.
- Refill the tank and restore power following the normal startup procedure.
Commercial Descaling Alternatives
- CLR (Calcium, Lime & Rust Remover): Faster-acting than vinegar but more expensive. Use the same soaking procedure. Rinse thoroughly afterward.
- Citric acid powder: Dissolve 2 to 3 pounds in 3 gallons of hot water and pour into the tank. Effective and food-safe.
- Commercial water heater descaling solutions: Several products are designed specifically for water heaters. Follow the manufacturer’s instructions for dilution and contact time.
Time Required
12 to 24 hours (mostly passive soaking time), plus 30 to 45 minutes of active work.
Method 5: Manual Removal (Extreme Cases)
In the most extreme cases, sediment fills a significant portion of the tank and resists all other methods. Manual removal is the last resort before replacing the tank entirely.
When to Use This Method
- You can hear sediment rattling like gravel when you rock the tank.
- The drain opening is blocked by material that vinegar did not dissolve.
- A plumber has quoted more for cleaning than a new tank would cost, and you want to try one more thing.
Steps
- Drain and disconnect the tank. You need the ability to tip or reposition the tank.
- Remove the drain valve and optionally the anode rod to create two access points.
- Use a wet/dry shop vacuum to suction sediment out of the drain opening.
- Flush water through the anode port while vacuuming from the drain opening, or vice versa. This agitates the sediment and allows the vacuum to capture it.
- Rock the tank gently (if disconnected) to break loose sediment from the walls and bottom.
- Repeat until the tank is clean.
This is labor-intensive and only makes sense for tanks that are young enough to justify the effort (under eight years old). For older tanks with this level of buildup, replacement is usually the better investment. See our guide on how long water heaters last.
Prevention: Keeping Sediment Under Control
Removing sediment is satisfying, but preventing it from building up is the real goal.
Flush regularly. The right frequency depends on your water hardness, household size, and tank age. Our flushing frequency guide helps you set a schedule.
Lower the temperature. Hotter water accelerates mineral precipitation. Keeping the tank at 120 degrees Fahrenheit instead of 140 reduces sediment formation. See our temperature guide.
Maintain the anode rod. A functioning anode rod prevents corrosion that adds rust to the sediment load. Check it every two to three years and replace it when depleted.
Treat hard water. A whole-house water softener removes the minerals before they reach the tank. This is the most effective single preventive measure for homes with water hardness above 7 grains per gallon.
Upgrade the drain valve. A full-port brass ball valve makes flushing easier and faster, which means you are more likely to actually do it on schedule. See our drain valve replacement guide.
Related Guides
- How to Flush a Water Heater, Standard flushing procedure
- How to Back Flush a Water Heater, Reverse-flow technique
- Water Heater Popping Noise, Diagnosing noise from sediment
- Annual Water Heater Maintenance Checklist, Complete yearly schedule
Sources
- U.S. Department of Energy, Water Heating, Sediment and efficiency data
- Water Quality Association, Hard Water, Mineral content guidelines
- USGS, Water Hardness, Regional data
- International Association of Certified Home Inspectors, Maintenance standards