How to Drain an Electric Hot Water Heater: Safe DIY Guide
A step-by-step DIY guide on how to safely drain an electric hot water heater to remove sediment, protect elements, and extend tank life in 2026.
HowToDrainAHotWaterHeater.com
June 3, 2026
Safety Disclaimer
Water heater maintenance involves working with pressurized systems, scalding hot water, and potentially hazardous electrical or gas connections. Always shut off power (electric heaters) or gas supply (gas heaters) and allow water to cool to a safe temperature before beginning any maintenance. Wear appropriate safety equipment including gloves and eye protection. If you're uncomfortable with any step, contact a licensed plumber.
To drain an electric hot water heater safely, shut off its circuit breaker, close the cold water supply valve, connect a garden hose to the drain valve, open a hot water faucet to release pressure, and open the drain valve to empty the tank completely before refilling and restoring power.
Executive Summary
- Power Down First: Shut off the circuit breaker before draining. Draining a powered tank will burn out the heating elements in seconds.
- Cool the Tank: Allow water to cool for a few hours before draining to prevent accidental scalding.
- Eliminate Vacuum: Open a hot water faucet to let air in, allowing the tank to drain smoothly.
- Flush the Sediment: Turn on the cold water valve briefly at the end to wash out remaining sediment.
- Refill Before Powering: Fully refill the tank and purge all air before turning the breaker back on.
Why should you drain your electric hot water heater?
Over time, tap water leaves behind mineral deposits like calcium and magnesium. These minerals settle at the bottom of the tank to form sediment. In electric water heaters, this buildup is a major problem. Electric models use two heating elements submerged directly in the water. The lower heating element sits near the bottom, right where the sediment collects.
When sediment buries the lower element, it acts as an insulator, trapping heat and preventing the element from warming the water. The element has to run longer, causing it to overheat and fail. In 2026, with electricity rates higher than ever, a sediment-covered element increases your monthly utility bills. Regular draining prevents sediment from hardening, protects your elements, stops popping noises, and ensures reliable hot water.
What tools do you need before starting?
You do not need specialized plumbing tools to drain your electric hot water heater. Most required supplies are common household items. Gathering your tools beforehand ensures the process goes smoothly.
Here is the list of tools and supplies to gather:
| Tool / Supply | Purpose |
|---|---|
| Garden Hose | Carries water away from the tank. |
| Flat-head Screwdriver | Opens and closes the slot-head drain valve. |
| Channel Lock Pliers | Loosens tight hose connections or turns stiff valves. |
| 5-Gallon Bucket | Catches initial water to inspect sediment. |
| Safety Glasses & Gloves | Protects your eyes and hands from hot water. |
| Towels or Rags | Cleans up small spills around the valve. |
Select a garden hose rated for high temperatures. Cheap vinyl hoses can soften, kink, or leak when hot water flows through them. A heavy-duty rubber hose is a safer option.
What safety precautions must you take before draining?
Safety is the most critical part of this DIY project. Electric water heaters use high-voltage electricity and store hot water. Taking shortcuts can lead to injury or expensive damage.
First, turn off the power. Electric heaters run on 240-volt circuits. Never drain the tank with the power on. If the elements are exposed to air while powered, they will burn out in seconds. This is called dry firing, and replacing them is costly.
Second, avoid scalding. Water inside your tank can reach 140 degrees Fahrenheit. Allow the heater to sit without power for two to three hours before draining, or run hot water from a faucet until it runs lukewarm. Always wear gloves and safety glasses.
How do you turn off the power and water supply safely?
Before touching any plumbing, you must isolate the heater. Start at your home’s main electrical panel. Find the double-pole circuit breaker labeled “Water Heater” or “WH.” Switch this breaker to the “Off” position. To be absolutely sure the power is off, check that any display panel on a modern 2026 smart water heater is completely dark.
Next, shut off the water supply. Locate the cold water pipe entering the top of the tank. You will see a shutoff valve, typically a lever-style ball valve or a round-handled gate valve. If you have a ball valve, turn the lever 90 degrees. For a gate valve, turn the round handle clockwise until it stops. This stops cold water from entering, allowing you to empty the tank.
How do you attach the hose and route the water?
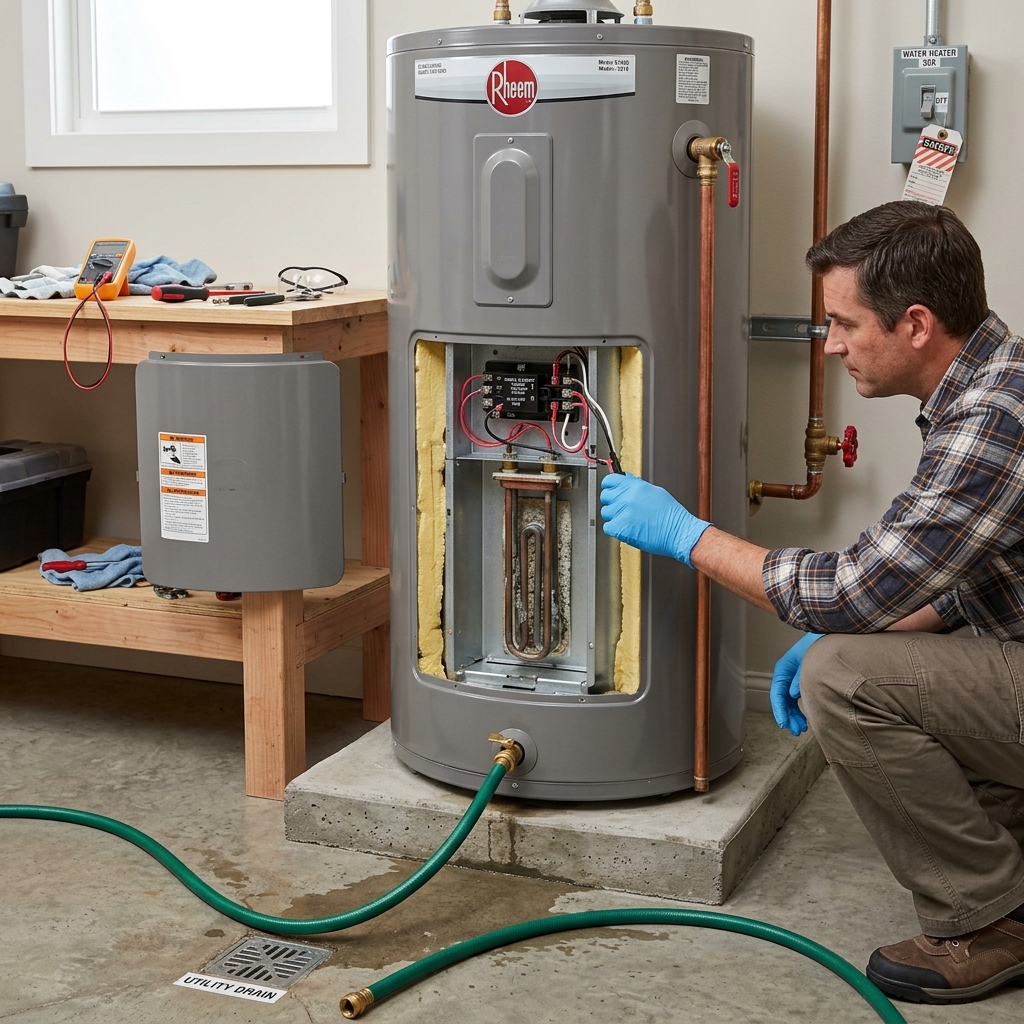
With the power and water shut off, locate the drain valve at the bottom of the tank. Remove the plastic cap if one is present. Thread your garden hose onto the valve by turning the fitting clockwise. Hand-tighten it, then use channel lock pliers to turn it another quarter-turn. Do not overtighten, especially on plastic valves, as they can crack.
Route the other end of the hose to a safe drainage spot, like a basement floor drain or utility sink. If you do not have a floor drain, run the hose outside to a driveway or gutter. You can read our guide on how to drain water heater without floor drain for helper tips. Make sure the water has cooled before discharging it onto a lawn, as hot water will kill your grass.
How do you drain and flush the electric water heater tank?
To begin draining, open a hot water faucet on an upper floor or in a bathroom near the heater. This lets air enter the system, breaking the vacuum inside the pipes so the water can flow out freely. Without this air entry, the water will glug or stop draining entirely.
Next, open the drain valve by turning the handle counterclockwise or using a flat-head screwdriver on the screw slot. Water will start flowing through the hose.
Once the tank is empty, flush out the loose sediment at the bottom. Leave the drain valve open and turn the cold water inlet valve on for 30 seconds, then shut it off. This blast of cold water stirs up the sediment and washes it out. For a complete walkthrough, read our guide on how to flush a water heater. Repeat this step until the water runs clear.
How do you safely refill the tank and turn the power back on?
Once the water runs clear, close the drain valve by turning it clockwise. Disconnect the garden hose and replace the protective cap. Use towels to wipe up any minor drips.
Keep the hot water faucet you opened earlier in the house open. Turn the cold water supply valve at the top of the water heater back on. You will hear water rushing into the tank.
As the tank fills, it pushes air out through the open faucet. The faucet will sputter and spray air and water. Let the water run in a steady, unbroken stream for at least one minute. This step ensures that the tank is full and no air pockets remain. Once the air is purged, turn off the faucet. Now you can safely flip the circuit breaker back to the “On” position.
How often should you perform this maintenance task?
Regular maintenance is key to maximizing the lifespan of your electric water heater. For most homes, draining and flushing the tank once a year is sufficient. However, your local water quality plays a significant role in determining how often to do this.
If your home has hard water, which contains high levels of dissolved calcium and magnesium, sediment builds up much faster. In this case, you should drain and flush your tank every six months. The same applies if you use a well water system, which often carries fine silt and rust.
To learn more about your maintenance needs, read our article on how often to flush water heater. Keeping up with this task prevents sediment from hardening, making it much easier to remove.
How do you troubleshoot a clogged drain valve?
If you open the drain valve and no water comes out, the valve is likely clogged. This is a common issue for water heaters that have not been drained in several years. Sediment settles at the bottom of the tank, blocking the valve opening.
To clear the clog, verify the cold water supply is shut. Unscrew the garden hose and insert a stiff wire, like a straightened coat hanger, directly into the valve. Gently push and twist the wire to break the sediment blockage. Keep a bucket under the valve to catch the water.
Another method is to backflush the valve. Connect your garden hose to a nearby faucet and the other end to the drain valve. Turn the faucet on for a few seconds to force water backward into the tank, pushing the clog away from the valve. Disconnect the hose from the faucet and let the tank drain.
What are the specific benefits of doing this in 2026?
Draining your electric water heater offers major advantages in 2026. High energy costs make utility bills a primary household concern. Electric resistance heating is already one of the most expensive ways to heat water. By removing insulating sediment, you ensure that 100% of the electrical energy goes directly into heating the water, lowering your power bills.
Additionally, modern electric water heaters in 2026 feature smart controls and advanced heating elements. These electronic components are sensitive to temperature spikes. When sediment buries the lower element, it overheats, which can trigger system error codes or damage internal sensors.
By draining your tank regularly, you protect these high-tech components from heat damage and extend the lifespan of your appliance. A well-maintained heater can easily last 12 to 15 years, saving you money on replacement costs.
How can you ensure long-term water heater health?
Draining your electric hot water heater is a simple, cost-effective DIY project that pays off immediately. It takes less than an hour but provides major benefits in energy efficiency and element protection.
Remember the most critical rule: never turn on the circuit breaker while the tank is empty. If you follow the steps in this guide—powering down, cooling the tank, draining the water, flushing out the sediment, and purging the air before restoring power—you will keep your system in top condition. Mark your calendar for your next annual or semi-annual maintenance check to protect your appliance for years to come.

HowToDrainAHotWaterHeater.com
Editorial Team
We're DIY homeowners who got tired of paying plumbers $300 to turn a drain valve. Our guides are built from manufacturer documentation, plumbing code references, and real-world experience maintaining our own water heaters.